
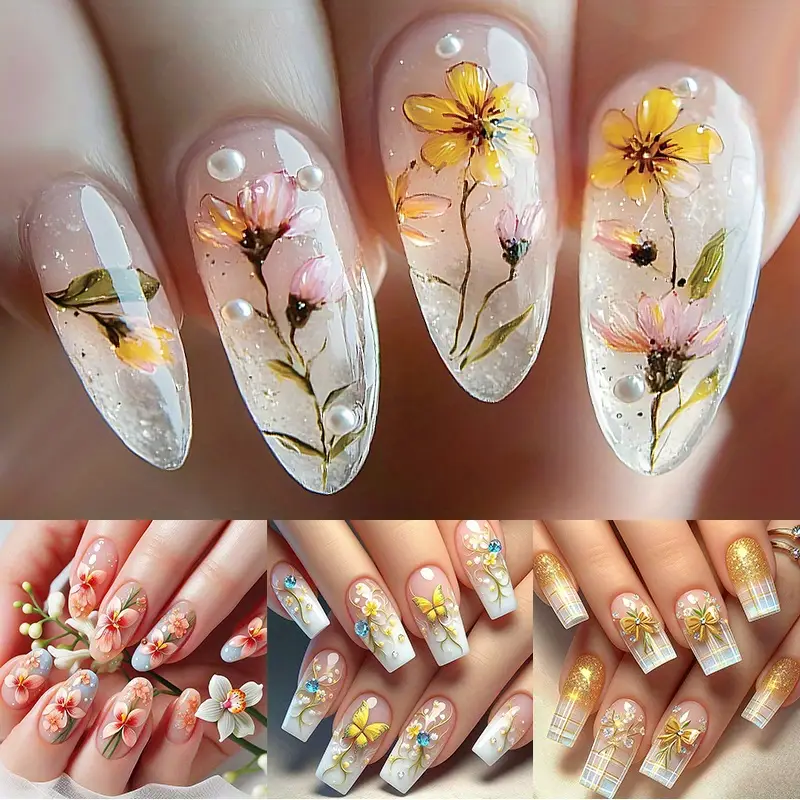
DIY Nail Art Guide: How to Create Glitter French Tips with Flower Accents
A beautiful manicure is the perfect way to express your personal style. While visiting a salon is nice, creating your https://sk-sasa.com/ own nail art at home is both fun and rewarding. You do not need to be a professional artist to achieve a gorgeous look. By combining three classic trends—the French manicure, sparkly glitter, and delicate flowers—you can create a stunning, timeless design.
This comprehensive guide will teach you how to achieve a salon-quality manicure right at your kitchen table. With a few simple tools and a little patience, you will have a beautiful set of nails that you can proudly show off to your friends.
🛠️ Essential Tools and Materials
Before you begin, gather all your supplies so you do not have to search for them with wet polish on your fingers.
- Clear Base Coat: Protects your natural nails from staining and helps the polish stick.
- Clear Top Coat: Seals your design, prevents chipping, and adds a high-gloss shine.
- Sheer Background Polish: A soft, sheer nude or light pink color works best.
- Glitter Polish: Choose a polish with fine, dense glitter for a smooth line.
- Nail Art Polishes: A crisp white polish for petals and a bright yellow for flower centers.
- Dotting Tool: A bobby pin, toothpick, or a sharpened pencil work perfectly as substitutes.
- French Manicure Stencils: Optional, but very helpful for creating clean, curved lines.
- Nail Polish Remover and Brush: For cleaning up any messy edges around your skin.
💅 Step-by-Step Application Guide
Step 1: Prep and Prime
The secret to a long-lasting manicure is proper preparation. Start by washing your hands to remove any natural oils or lotions. File your nails into your desired shape, such as almond, oval, or square. Gently push back your cuticles with a wooden stick. Next, apply one thin layer of clear base coat to all ten fingers. This creates a smooth surface and prevents your natural nails from turning yellow. Allow this layer to dry completely for two minutes.
Step 2: Apply the Background Color
To make your glitter and flowers pop, you need a clean background. Apply two thin coats of your sheer nude or light pink polish. It is always better to apply two thin coats rather than one thick coat, as thin coats dry much faster and resist bubbles. Wait about three to five minutes between coats so the polish can set.
Step 3: Craft the Glitter French Tips
Now it is time to add some sparkle. If you are using stencils, place the curved sticker just below the free edge of your nail. If you are painting freehand, breathe deeply and move the polish brush slowly across the tip of your nail from one side to the other. Paint the entire tip with your glitter polish. If you used a sticker, peel it away immediately while the glitter polish is still wet to get a perfectly crisp line.
Step 4: Dot the Flower Petals
Choose one or two accent fingers on each hand to host your floral design, such as your ring finger or thumb. Pour a tiny drop of white polish onto a piece of plastic or foil. Dip the round end of your bobby pin or toothpick into the white puddle. Press the tip onto your nail to create five small dots arranged in a tight circle. Place this flower right on the boundary line where the glitter tip meets the nude background.
Step 5: Add the Golden Center
Let your white petals dry for about sixty seconds so the colors do not bleed together. Clean the tip of your dotting tool with a quick wipe. Dip the clean tool into your yellow polish. Gently tap one single dot directly into the center of your white flower petals. This simple step instantly brings your little daisy to life.
Step 6: Seal and Protect
Allow your finished artwork to dry for at least five full minutes. If you rush this step, you risk smudging your beautiful flowers. Once the polish feels dry to the touch, apply a generous layer of clear top coat over the entire nail. Be sure to glide the brush gently without pressing too hard. Glide the brush across the very top edge of your nail tip as well; this “caps” the nail and prevents the glitter from peeling off early.
💡 Pro Tips for Manicure Success
- Fixing Mistakes: If you get polish on your skin, dip a small makeup brush or cotton swab into nail polish remover. Carefully wipe around the edges of your nail to clean it up.
- Thin Layers Win: Thick layers of polish trap air and stay gooey for hours. Always wipe excess polish off the brush against the bottle neck before painting.
- Patience is Key: Let each step dry fully. Rushing through nail art is the number one cause of smudges and ruins your hard work.
Would you like to explore different color combinations for this design, or do you need help choosing the best nail shape for your hands?